
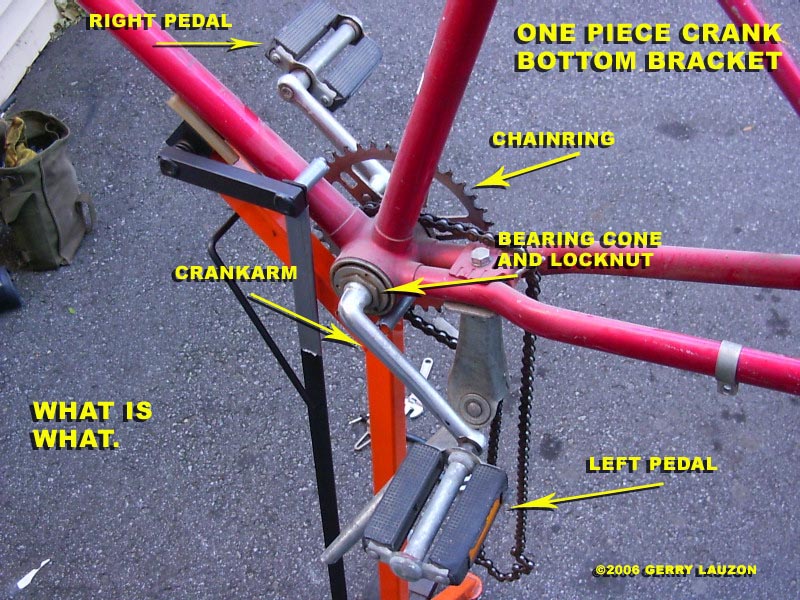


Most coaster brake bikes are equiped with what is called a one piece crank bottom bracket. They can also be found on BMX bikes and the cheap variety chain store bikes. This set-up is pretty heavy compared to the three piece bottom bracket, but it has the advantage of being pretty tough with its washing machine type crown bearings. I've opened up bikes that the bearings had never seen the light of day for 30 years and still find them in working order. Also, I've never seen a one piece crank break or come off.
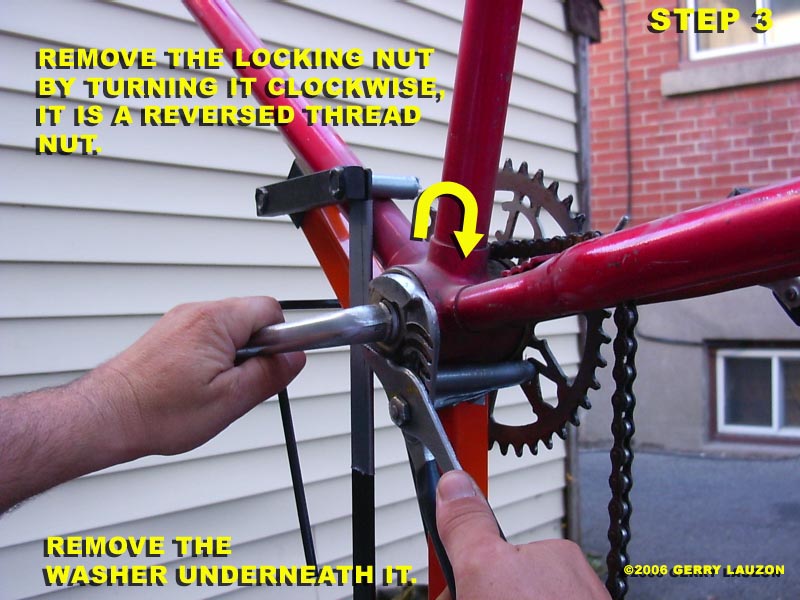
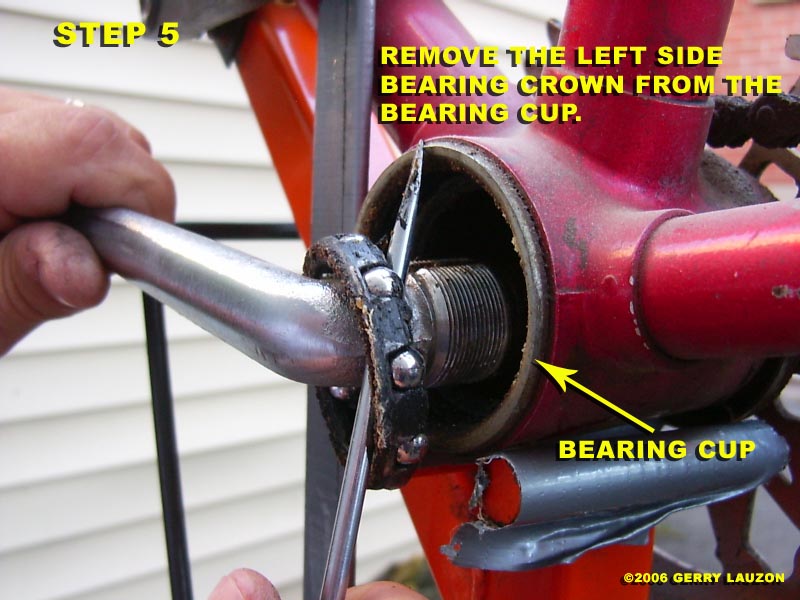
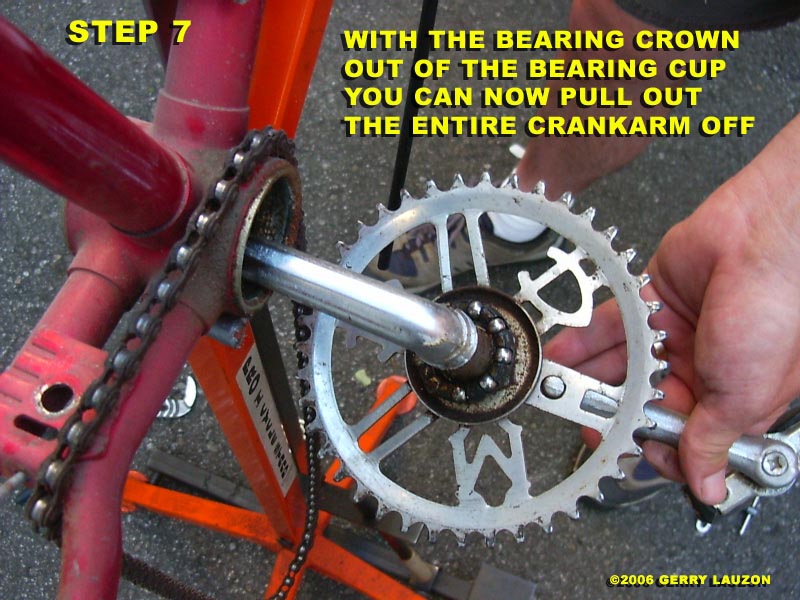
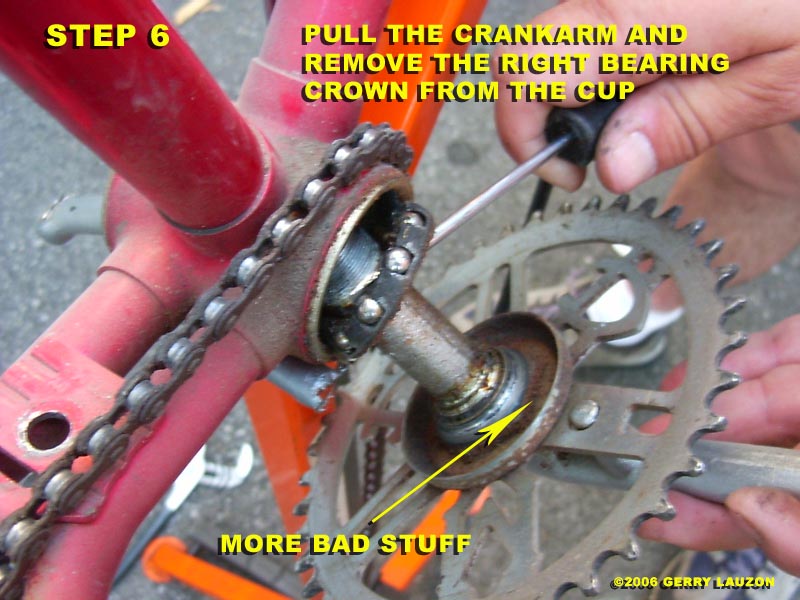
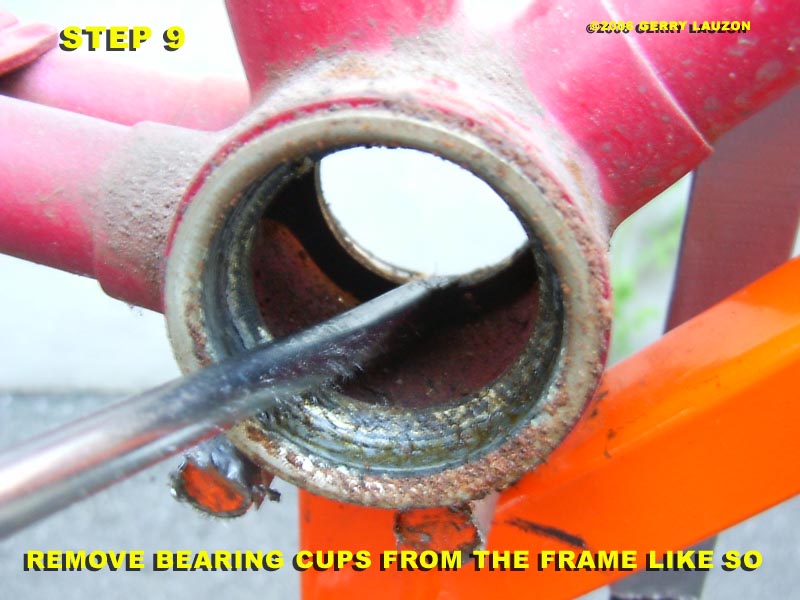
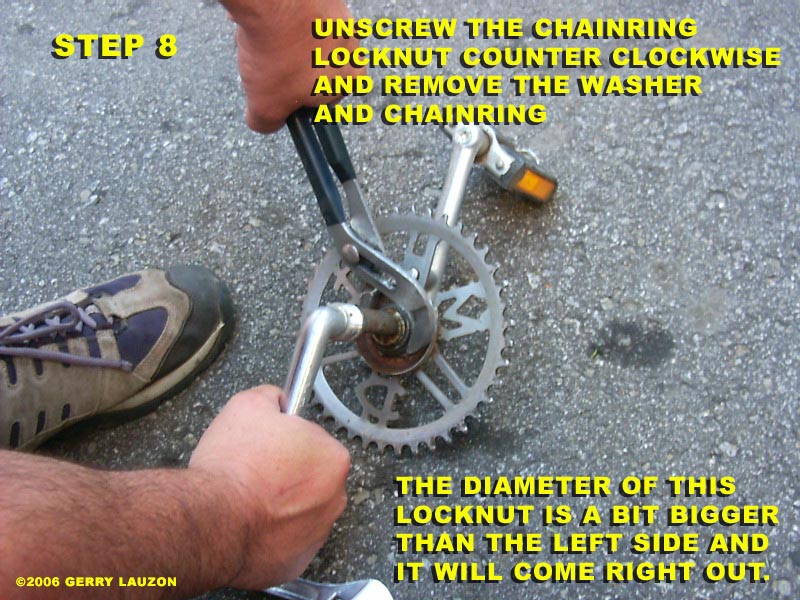
Our Lowrider project is equiped with such a bottom bracket and we are going to take it off. Pretty easy if you follow my step by step illustrations. One thing to remember is that some threads are reversed on a bike, like the left side pedal and the locknut and bearing cone on the left side of the bottom bracket. You have to unscrew those by going clockwise.
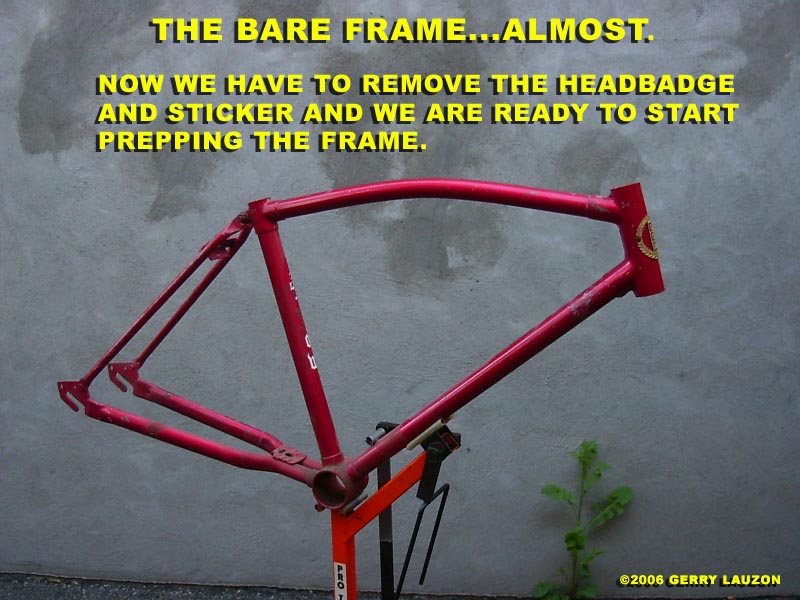
After you've taken everything apart, make sure you store it all in a place you can find it again and not lose anything throughout the cleaning process before reassembly. Our next article will be about how to clean out all these nice parts. Until then, ride safe.
Gerry


42 comments:
Dude,
You forgot the Batman sound effects on that last post!
Great blog!
The Biketranny
Love how you wrote the steps on the photo that went along with it. It helped make this so easy to understand.
Glad I could help. :)
My sons pedals on his bmx bike wont turn his wheel? It is a free-agent bike with a crank like the one described here? Do you think its the crank that has something broken or the back tire which has a small sproket on it? Something is not engaging? Can you help?
Thanks
I too, am a big fan of 1 piece cranks on most things, except BMX. I snapped one on my BMX, and went to a 3 piece. Never looked back. Then again, I wreck a lot of chains, freewheels and the like. My cruiser, however, does just fine with the double-bender.
Hiya just wondering if you can help me. I haev a mountain bike adn the left sided pedal or crank sorry, is wobbling. Ive tried tightening it but it still doesnt work.
just wondering if you can help me.
You'll have to replace the entire crankarm. It will never seat properly again once it came off while riding. Not even Loctite can help you now. Sorry.
Gerry :)
http://pics.livejournal.com/vintage_wheels/pic/00027dzf/
So what happends when you have seized pieces on your old CCM bike and can`t get the pedals off? I did go in the correct direction.
Also take a quick look and tell me if you know how old this bike might be?
http://vintage-wheels.livejournal.com/
Thanx much!
Heather
Heather, the left side pedal(the side without the chain) as to be turned clockwise to unscrew it, the right pedal unscrews normally counterclockwise. If it's stuck, use a hammer on the wrench but be careful. The CCM Scrambler was made in the late 60's.
Gerry :)
Freaking awesome walk through! Bought a great old racer cheap last year. Any other place but NYC it would have been free.
Thing weighs five thousand pounds:) Striped it down and cleaned almost everypart(first time in 20 years I think!), got it ready for touring, and bounced around Maine for four weeks.
Untill reading your walkthrough and seeing the pictures today the ONLY place I did not know how to get at was inside the crank area to clean and grease the barrings.
I just finished opening and cleaning my on piece crank and wanted to say thanks!!
-Anthony Santoro
Thanks for sharing your story Anthony, I'm happy this site could be of help to you and appreciate you reading it. Have a great day and ride safe.
Gerry :)
How do i do step eight. Which locking nut??
The one grabbed by the pliers in the picture. There has to be a nut there to hold the chainring in place.
Gerry :)
Update.
Went on the first big bike ride today after playing with the crank.
After about 7 miles I found myself trying to put the little balls back in the old crank bearings.
I'd put them in the bike backwards the first time! Oops. Good thing I had brought all my tools!
35mins, and my friend and I were back on the road! Ended the day at 25miles! Insane.
Here is the video:
http://www.youtube.com/watch?v=UbXOvRA81jA
Thanks again for the great website. Bikes take on a whole new level when their mystery is gone!
-Anthony
Thanks for the video Anthony, I enjoyed it.
Gerry :)
i have 2 bikes and on my mongoose i cant get the crank off i removed the pedal and there is a alen key or hex key part i removed that and i still cant get the crank off.
Sounds like you have a 3 piece crank. Check out http://howtofixbikes.blogspot.com, I have an article about this in the sidebar.
Gerry
One note brought up by John just reminded me that the right side crank arm has a locking pin that needs to be inserted in the chain ring on re-assembly in order for it to work. John was pretty unlucky and ended up with a broken pin! This is the first time I hear this. Anybody else out there had the same experience?
Gerry :)
hey i love ur info but i took my crank off when i was fixing my bike to see if everything was working correctly and both of my crowns were broken into like 5 pieces i replaced them three different times and all of them have broke within the 2 months. what do i do? do u have and guesses on what the problem is?
Either you have bad bearings, a spot on the cone or cup or you have put in the wrong size bearing crown. I would check the surface of both cone and cups for any sign of pitting or scratches, that will kill any bearings.
Good luck
Gerry
I need help - I can't remember the order of things to put back together a rear wheel hub with coaster brake. HELP!
Pumper247
You only have one choice, go to ratrodbikes.com forum section "how-to" and you will find a few post there with coaster hub diagrams. Chances are yours should be in there.
Gerry :)
Thanks for your help. First time blogger, lots and lots of great info here.
Pumper247
Pretty good !
very very good !
Hey Gerry,
Your website has been very helpful to me. I just finished converting my bike into a fixed gear. So thanks again. I have a question about one piece cranksets, could I take a one piece and put it on a frame made for a three piece?
Thanks for your help.
Great to hear that you managed to put that bike together. To answer your question, no you can't transfer a one piece to a three piece bottom bracket frame. However, I have seen adapters to put a three piece on a one piece frame.
Gerry :)
i reassembled my one piece crank,and its nice and tight then when i take it for a test ride the right side gets loose and the chain cracks..do you know whats happening?
hi there. i have what ive been told a GT BMX bike. ive taken it apart once to check the bearings to regrease them and basically service it. i noticed the crank is bent a tad but when i ride the bike the chain tension gets hard then loose. i'm just wandering if i were to put it in a vice and try straighten it would it weaken the material or could i do good? also is there ANY way at a "back foot brake wheel" can be disabled from using the foot brake?. If not does anyone know of a place i can find some black plastic "mag" wheels?
Hey Clinton, from what you tell me the chain ring is still usable despite the fact that it's bent, so it can't be so badly bent that a little convincing in a vise shouldn't damage or weaken it. As for the back pedal brake hub, the answer is no for me.
Gerry :)
thank you so much, this made dismantling and repainting my bike so much easier, this is the only step by step guide I could find to help me with this.
I'm glad I could help.
Gerry :)
How did you remove the chain? Simply pushed a pin out? Can you then reuse the chain or do you have to get a new one? Do you have good way to measure the length of the chain?
Go to howtofixbikes.ca and look in the links to how-to articles. I have at least 2 videos on chain removal. Yes, if the chain is not rotten to pieces, you can re use it.
Gerry :)
Thank you Gerry. I got right into the bowels of my son's bike with your help. And now it works better than it did before I worked on it. Always a good feeling!
About to take apart the bottom bracket on an old Mongoose.. Scared, but feeling vaguely confident after reading through this. I shall let you know how I get on!
Peace!"
Thank you for all the informations , you did a great job. Patrick, QC
Glad you all benefit from this post.
Gerry :)
Fantastic Thanks Again
Great instructional pictures with text highlighting!
Great work Gerry!
Thanks a lot for sharing this. the picture guide was the best help when putting all parts back together.
Really nice and definitely it will be useful for many people. Kindly keep update like this.
Bike Spa Services in Mumbai
Thanks for this blog. All screenshots can explain the full blogs easily. This is very easy to understand. Using this screen shots know the details becomes easy.
Back to original
Post a Comment